How To Create A Timesheet Template In Excel
How to create a simple Excel timesheet
Tracking and managing work time in Excel is simple. Here's a visual guide to help you create and manage your daily, weekly, and monthly work hours in Excel timesheet templates with formulas.
How to add basic labels • How to add timesheet labels • How to calculate daily working hours • How to calculate weekly working hours • How to calculate monthly working hours • How to protect cells and the timesheet

Adding basic labels
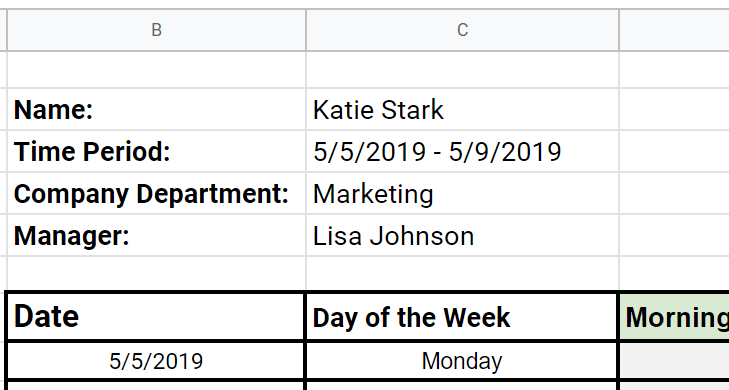
First, you'll need to decide what kind of basic data you need in your Excel time sheet. The most common approach is to add the following basic labels:
- Employee name
- Date range covered in the timesheet (day, week, or month)
- Name of the company department
- Manager name
You can add more information if you want or need to, but a simple approach is always best.
Adding timesheet labels
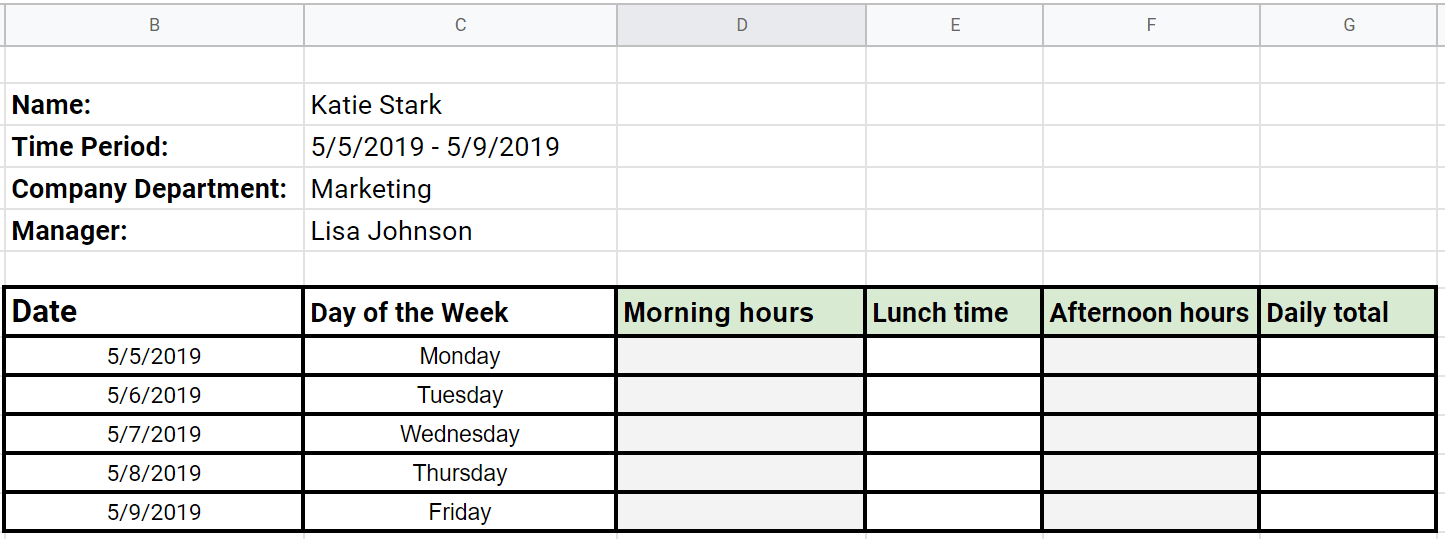
Now that you've added the basic labels, you'll need to add timesheet labels to your template.
Add the dates, and divide the columns in order to clearly organize the most important data:
- Time spent working before lunch
- Time spent at lunch
- Time spent working after lunch
For clarity, we'll mark these times in the timesheet as "Morning hours" "Lunch time", and "Afternoon hours".
In the next step, we'll see how to add up "Morning hours" and "Afternoon hours" to get the "Daily total" automatically.
Formula 1: Calculating daily working hours
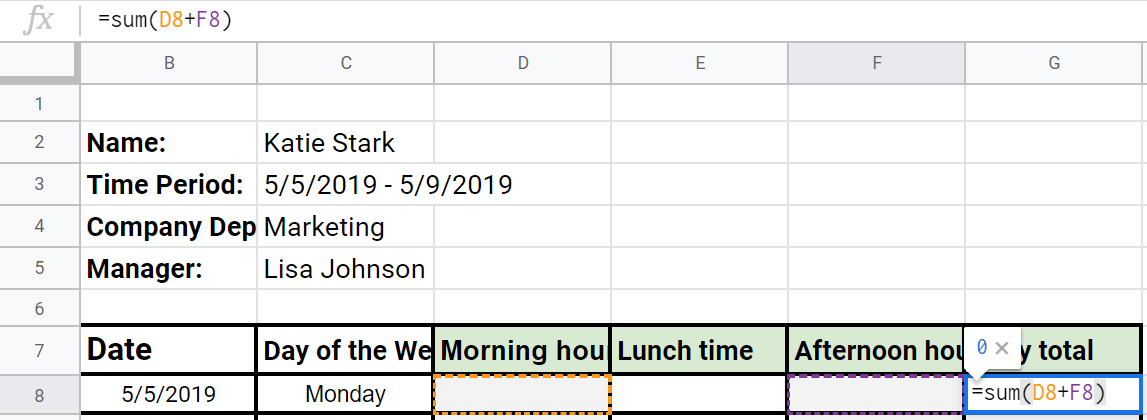
Here's how you calculate time in a daily Excel timesheet template:
- Insert =sum(D8+F8) into the "Daily total" cell (marked as G8 in this timesheet example).
- As soon as employees type the hours in the "Morning hours" and "Afternoon hours" cells, this time automatically gets added to the "Daily total".
- To use the same "=sum()" formula on the remaining days, expand the selection in your table to cover the remaining cells.
- Use the =sum() formula again in the "Weekly total" cell with the data in the "Daily total" column, by selecting the G8 cell, and then expanding the selection to G14 ("=sum(G8:G12)").
- As soon as employees add hours in the "Morning hours" and "Afternoon hours" cells, this time automatically get added to their "Daily total", and this data automatically gets added to their "Weekly total".
- You'll need to select the "Weekly total" cells (marked as G14, G30, N14, N30 in this Excel timesheet example) in order to calculate the "Monthly total".
- Insert =sum(G14+G30+N14+N30) into the "Monthly total" cell (marked as P4 in this timesheet example).
- Again, as employees enter their "Morning hours" and "Afternoon hours" in the right cells, the "Daily totals" and "Weekly totals" get calculated, and the "Monthly total" gets calculated as well.
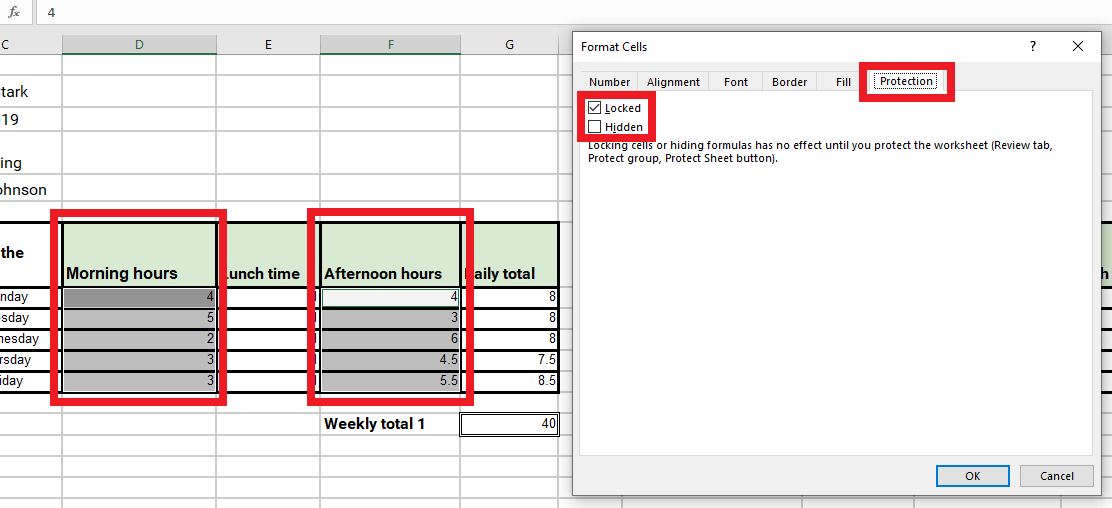
- Select all the cells you want to unlock by holding the Ctrl key and clicking or expanding on the needed cells
- Press the Ctrl+1 on your keyboard to get the Format cells window.
- Select the Protected tab within the Format cells window, untick the Locked checkbox, and click OK to close the dialogue box.
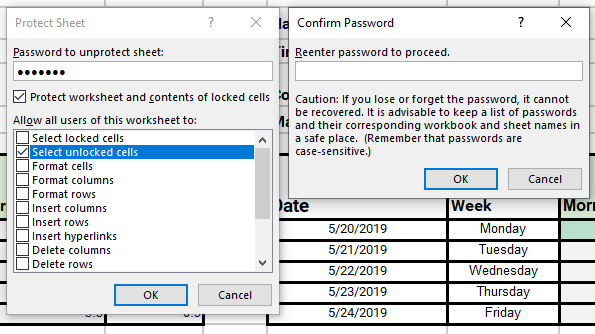
- Once you've differentiated between locked and unlocked cells, you'll need to make sure they stay that way, by "protecting" the sheet
- In order to open the "protect sheet" window, press and hold Alt+H+O+P
- Once you've opened this window, make sure only the option "select unlocked cells" is ticked.
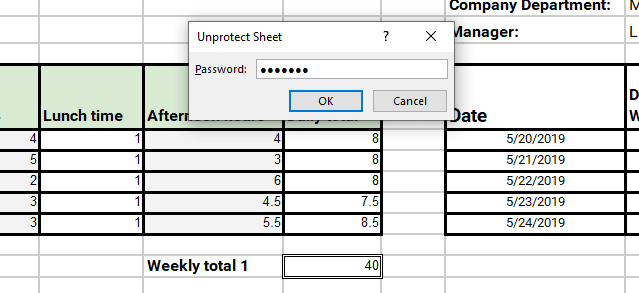
- Add and remember a password, then close the dialogue box - your employees will have to enter this password in order to edit the unlocked cells.
- The employees will need to press and hold Alt+H+O+P to open the dialogue box again, enter the password and enable cell editing - considering they only have the password to edit unlocked sheets, your locked sheets will remain uneditable, with formulas intact.


Expanding the selection to calculate the remaining days will be important when you want to calculate "Weekly totals".
Formula 2: Calculating weekly working hours
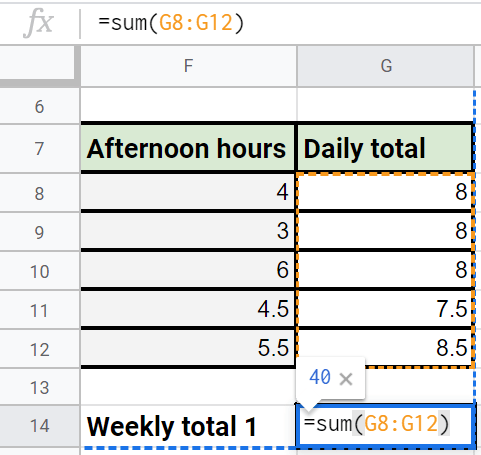
Here's how you calculate time in a weekly Excel timesheet template:
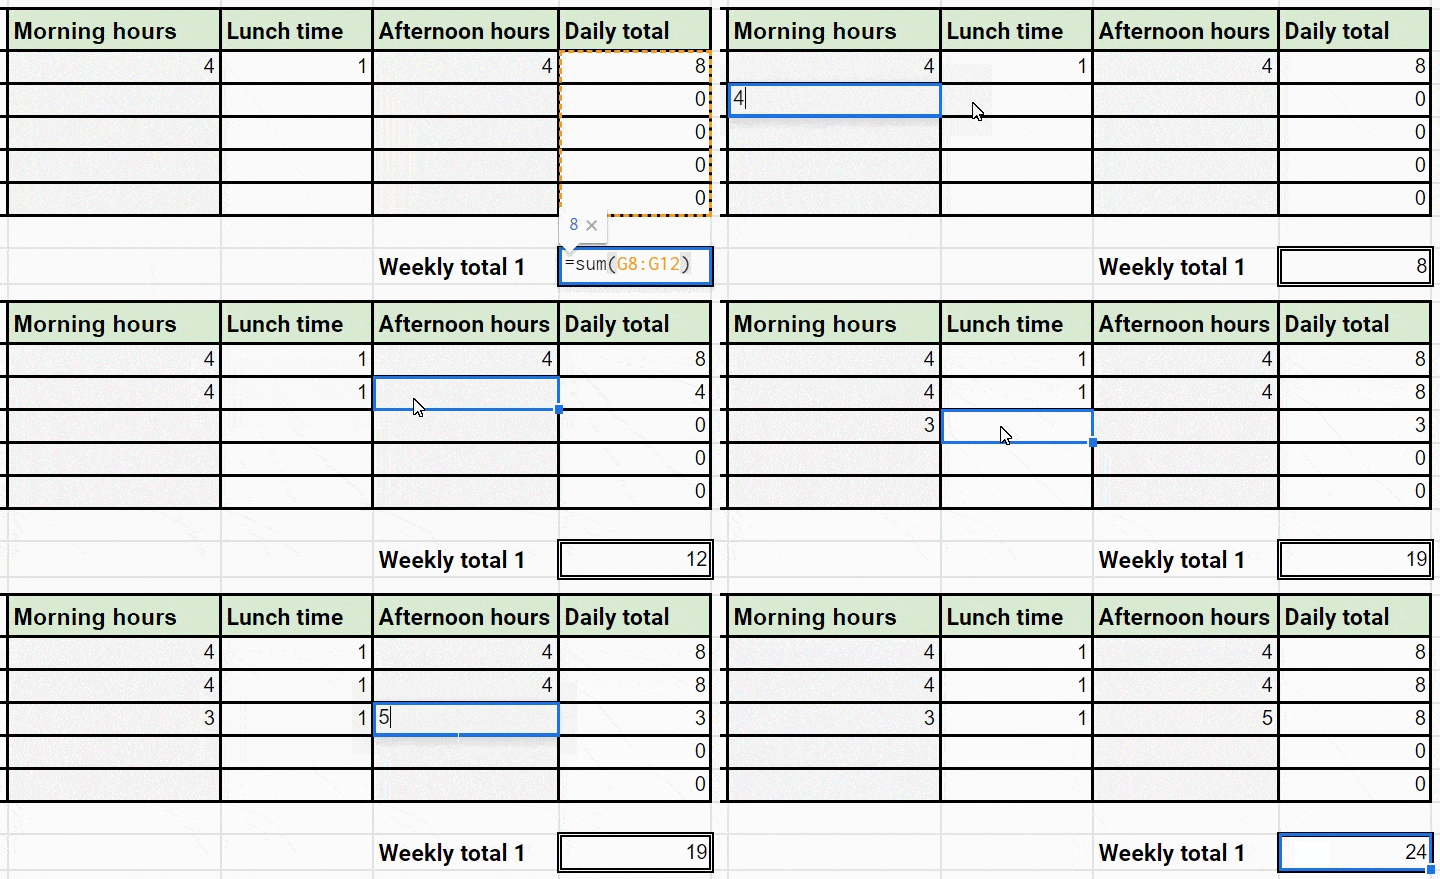
You can create multiple tables like this in one Excel sheet, and then calculate "Daily totals" and "Weekly totals" for each. Once you've had "Weekly totals" calculated, you'll use this data to calculate the "Monthly total".
Formula 3: Calculating monthly working hours
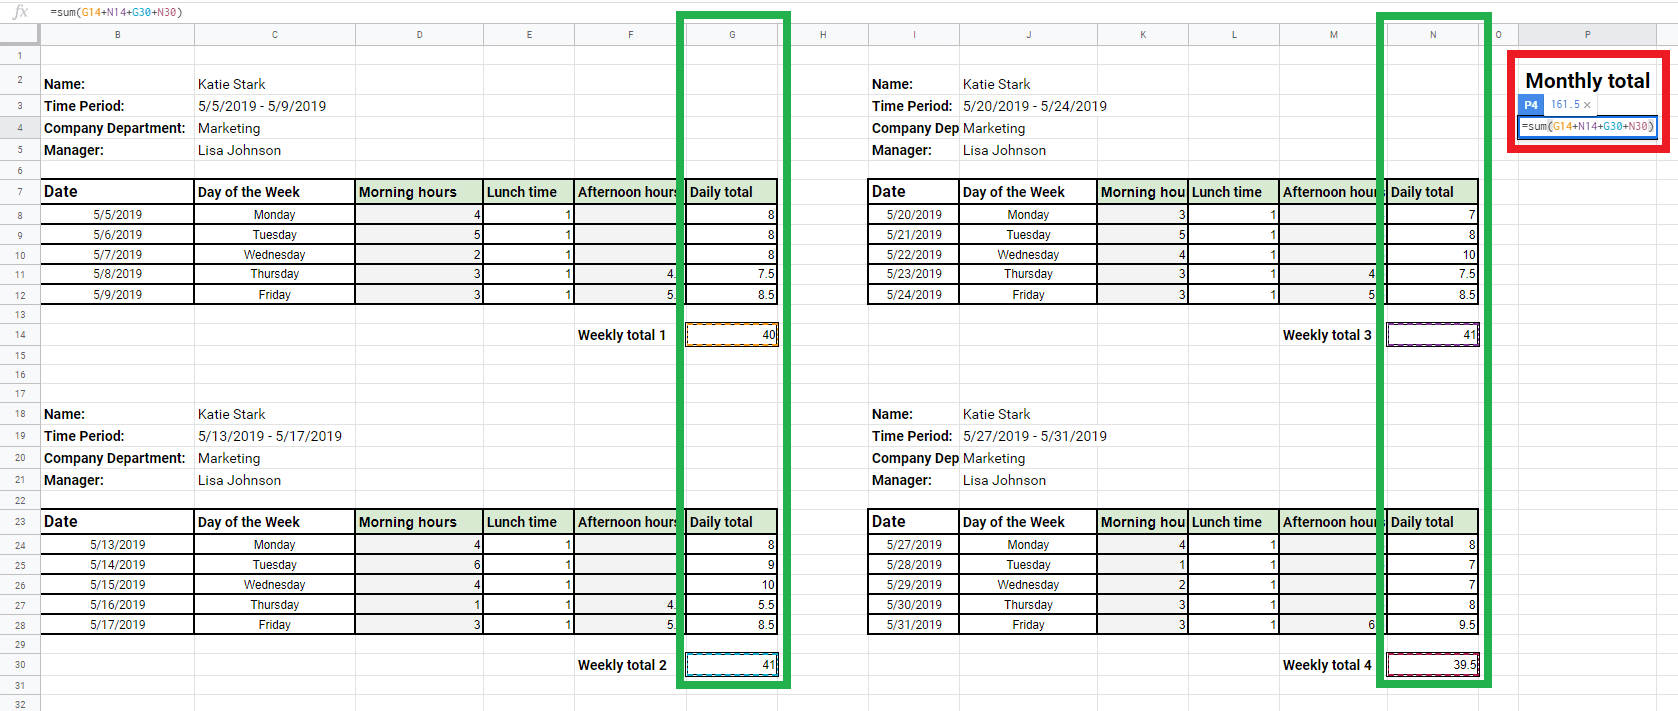
Here's how you calculate time in a monthly Excel timesheet template:
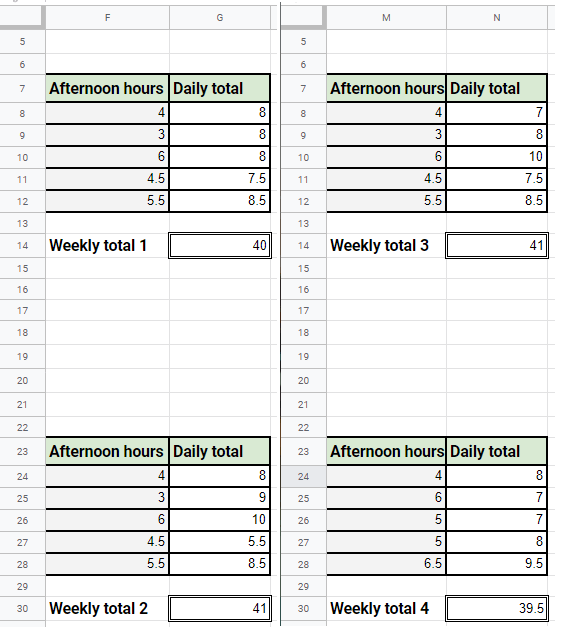
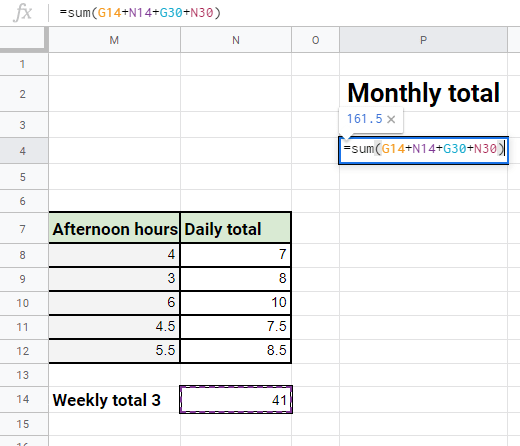
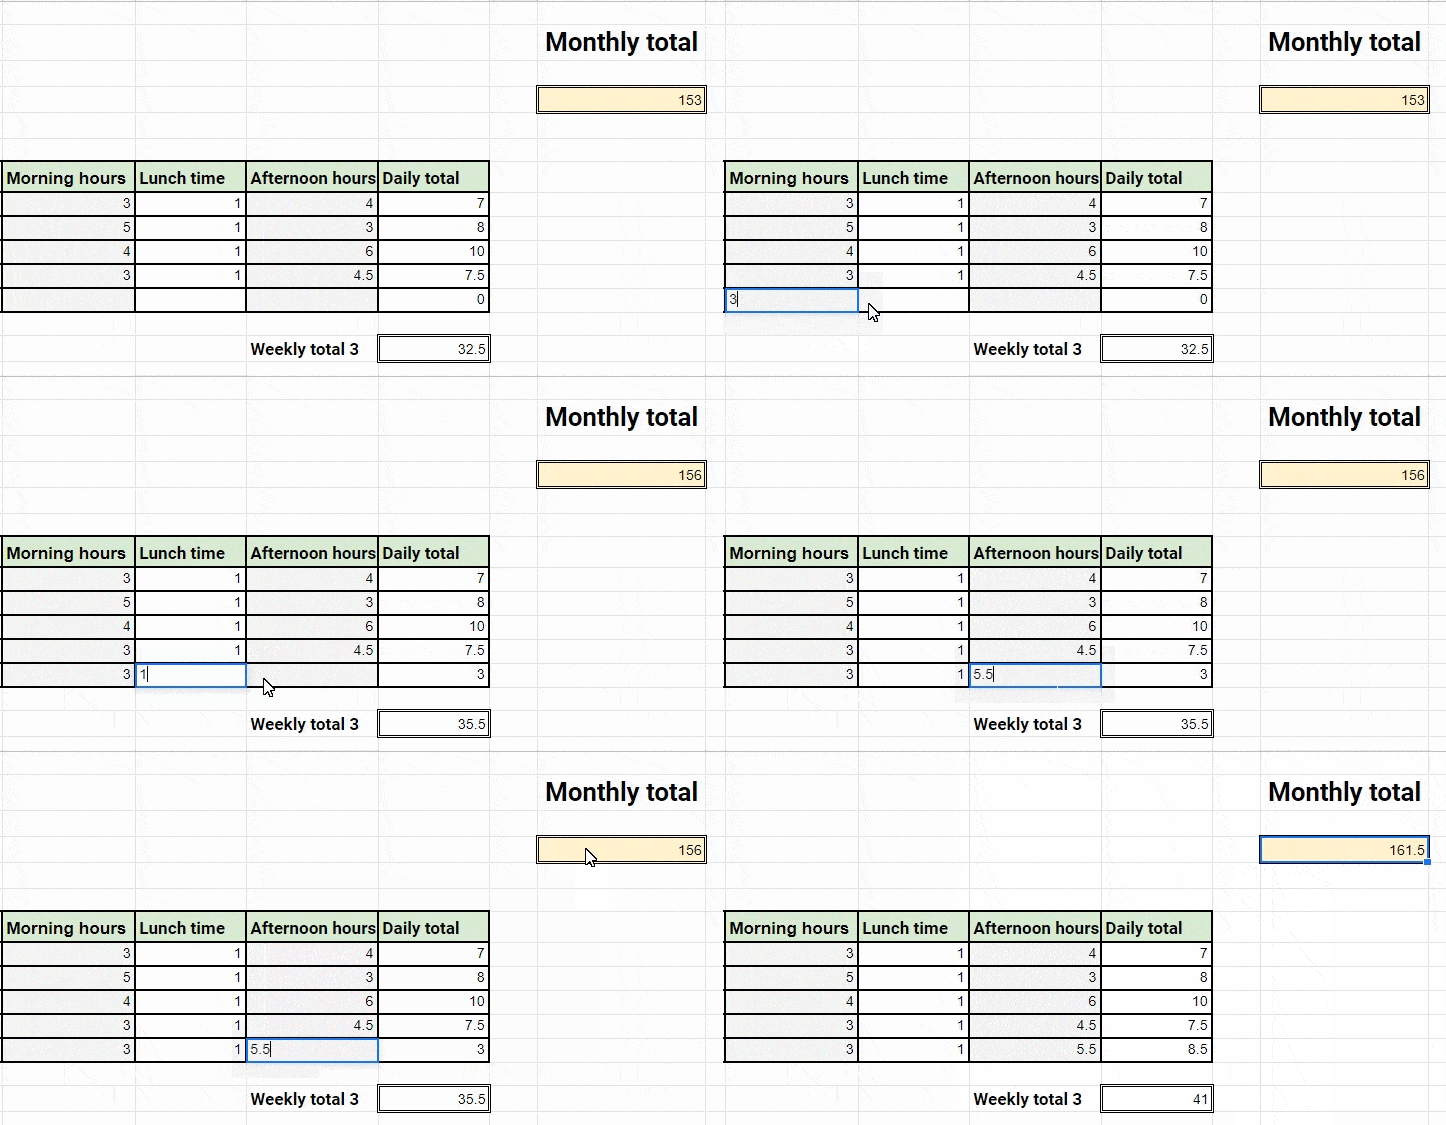
If employees change data in any of the cells, these changes will be reflected in the Monthly total.
Protecting cells and the timesheet
Once you've created your templates and defined all formulas correctly, you'll want to lock certain cells, in order to make sure your formulas remain functional and correct.
You'll also want to make sure certain cells remain unlocked, so that your employees can freely add their data - typically, you'll need "Morning hours", "Lunch time", "Afternoon hours", and "Name" cells unlocked, and formula cells locked.
By default, all your Excel cells are locked, but you'll be able to manage them in the Format cells window.
In order to unlock cells for employee editing, simply:
Or, avoid all this work with Clockify
You've seen how you can create daily, weekly, and monthly Excel timesheet templates - but you can simply use our free timesheet app Clockify and enter, calculate, and lock your timesheets in a couple of clicks, in a ready-made, straightforward template.
Online timesheet
With Clockify, you'll also be able to track the time you spend on tasks with a timer, for more precision, as well as clock in your overtime, vacations, sick leaves, PTO, breaks, and unpaid leaves.

Automatic calculations in reports
At the end of a certain time period, you can run Summary, Detailed and Weekly reports, to analyze time spent working.

PDF export
You can also export this data as PDF or Excel files, and analyze further, or simply keep for documentation.
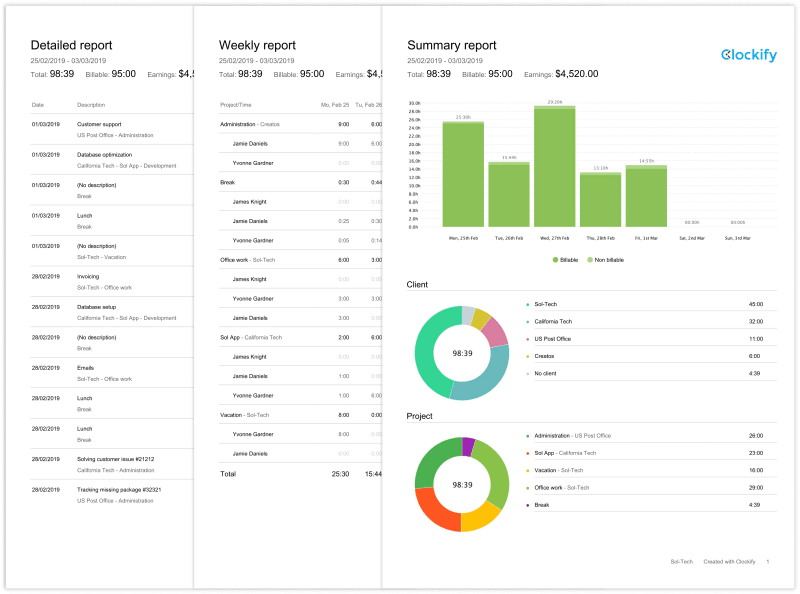
Download PDF samples: Summary • Detailed • Weekly
Spreadsheet export
You can also download any report as Excel or CSV file to create custom pivot tables, arrange data as you see fit, or for arhive purposes.
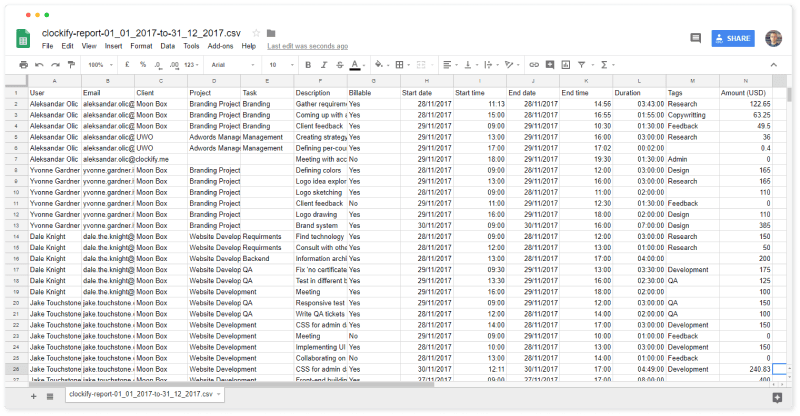
Download spreadsheet samples: Excel • CSV
How To Create A Timesheet Template In Excel
Source: https://clockify.me/how-to-create-simple-excel-timesheet
Posted by: youngallind.blogspot.com

0 Response to "How To Create A Timesheet Template In Excel"
Post a Comment